All Posts By

Charles S.

How to Build a PC: CEG’s New Testing Rig

By Gaming No Comments
Introduction

Over the past few years, PC gaming has become an even larger competitor to console gaming. In 2017, the PC gaming industry hit $28 billion in revenue and that number is projected to climb to just under $34 billion in 2020. Unlike the ready-to-play out of the box console competitors, Xbox & Playstation, PC gamers are unique in that their systems are built to their own design and to perform according to their own specifications. While having to build a PC can seem like a daunting task and could serve as a barrier to entry into the world of PC gaming, it’s honestly about as difficult as putting together a LEGO set. In this article, we will walk you through our very own PC build in order to show readers that building a PC is rather easy, and the results are more than worth the effort.

Step 1: Selecting the Components

Step one is the most important part of the whole process: determining which components you will buy for your PC build. Builds can range from a budget low-end PC to ultra high-end overkill, but it’s important to craft a build that 1.) is comprised of components that are compatible with one another, 2.) meets your performance needs and budget, and 3.) is aesthetically pleasing to you. Here at CEG, we like to recommend the website PC Part Picker, a source that will help you build a PC from scratch and tells you whether or not your build components are compatible. Your build will require the following components at minimum:

  • PC Case
  • Motherboard
  • CPU (most come with CPU fan cooler)
  • GPU
  • RAM
  • Power Supply
  • SSD/HDD
  • SATA Cables
  • PCI-E Power Cables
  • Operating System (software)
  • Keyboard
  • Mouse

Once you have your parts, it’s time to start the build!

Step 2: Connecting CPU, CPU Cooler & Ram to the Motherboard

There’s a couple of ways to do this step: 1.) Attach the CPU, CPU fan cooler and RAM to the motherboard before installing the motherboard inside of the case, or 2.) install the motherboard first and then attach the other components. The first way is typically easier because you don’t have to be bent over your case trying to screw/unscrew things from an awkward angle. For our purposes, we re-used the case from our old testing rig for the new build and already had our power supply & HDD installed, so it was easy to drop the motherboard into the case and start connecting. As you can see from the video above, installing the CPU is very easy. First make sure you properly align the CPU with the socket on the motherboard, for these Ryzen CPU’s there is a small triangle indicator on both the CPU and the socket which indicates the proper orientation for the CPU. Next lift the little latch on your motherboard, slot in the CPU, and press down the latch. Make sure that the CPU is snug – otherwise this will cause you major headaches down the line.

Next we’ll install the CPU cooler shown in the short video above. Most CPUs come with a CPU cooler nowadays, but they are available for purchase separately if yours does not or if you want to spice up the aesthetics of your build with a fancy RGB LED one. For our build, we went with the AMD Ryzen 9 3950X which is the only Ryzen 3000 series CPU that does not come with a CPU fan cooler, we used a CPU fan cooler that we had on hand from a AMD Ryzen 5 3600X that was compatible. To install the fan, you must first remove the brackets on your motherboard (pictured below).
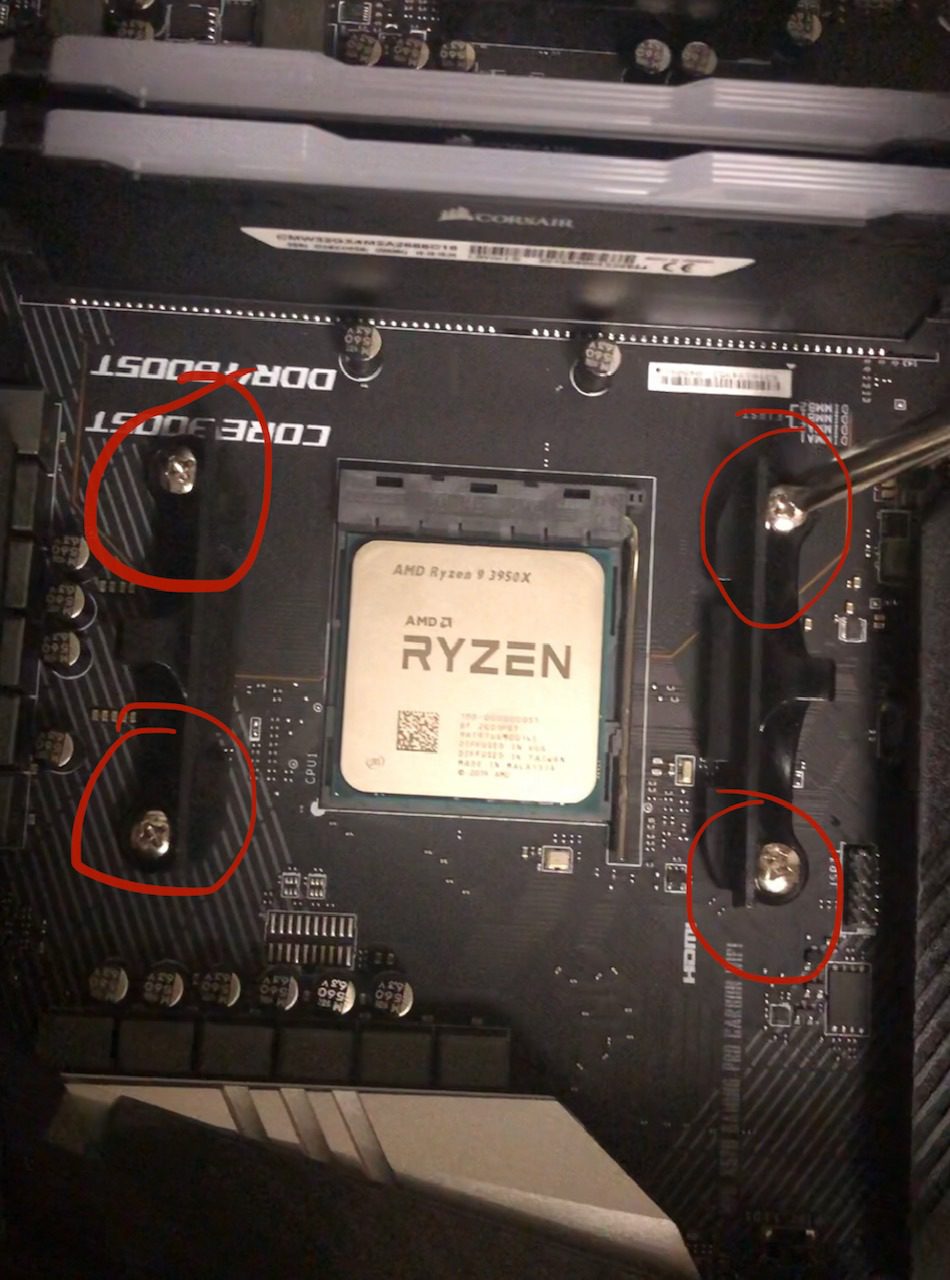
The CPU cooler is placed directly on top of the CPU. However, before screwing the cooler to the motherboard it’s important to make sure you have a healthy glob of thermal paste applied to the top of the CPU. Thermal paste is essential for the heat dissipation from the die of the CPU and your heatsink, not having thermal paste can lead to overheating and crashing. Once you’ve made sure that you have thermal paste applied, secure the cooler to the motherboard by screwing it in to the motherboard around the CPU where the brackets were located. Lastly, you’ll need to connect the cable attached to the CPU fan cooler to the motherboard (see video below – the power connector is typically labeled “CPU_FAN” or “CPU_FAN1”).

With the CPU and fan cooler installed, it’s time we connect the RAM to the motherboard. RAM is probably the easiest component to install and simply pops in to the allocated slots (see video below). Three important notes when installing RAM are that most motherboards have slot configurations for multiple sticks of RAM, meaning that it matters which slots you place the sticks in. For our motherboard, the MSI MPG X570 Gaming PRO Carbon WiFi, the optimal slot configuration is A2/B2. The slots should be clearly identified on the motherboard. Additionally the RAM only installs in one direction, to make sure you slot it in correctly make sure the pins and cut out on the RAM lines up with the RAM slot properly. Finally, don’t be afraid to push with some force, RAM often causes issues if not installed snugly.

Step 3: Installing the Motherboard

Now that we have the CPU, CPU fan cooler and RAM connected to the motherboard, it’s time to install the motherboard in the case. As shown in the video below, it’s important to line up the I/O shield, part of the motherboard that contains all of your ports, with the opening on the side of your case. If the I/O shield is not lined up properly, some of your ports may be inaccessible and the motherboard will not line up with the case connection points. Once you’re certain that the I/O shield is lined up correctly, you can screw the motherboard into the case as shown in the video below. Some motherboards, like ours, only have four holes at the edges of the motherboard while others will have a couple of points in the middle of the board as well, so make sure you use the correct ones for your board as they can differ slightly.

Step 4: Installing the Power Supply & SATA Storage

The next step in the build process is to add the power supply and SATA storage. As we mentioned earlier in the article, we decided to reuse the case, power supply and SATA storage from our old testing rig for the new testing build. Because of this, we did not remove them from the case when assembling the new build. As you can see in the picture below, the aforementioned components are secured to the case in their correct places and the appropriate cables have been connected. This video shows the step-by-step process of installing the power supply, and this video shows the installation of the SATA storage. Once the power supply and storage have been installed and the appropriate connections to the motherboard have been made, it’s time to install the graphics card.

Step 5: Installing the GPU

Installing the graphics card is the last step before powering on your new PC build. Take the GPU and line it up with PCIe slot on your motherboard. Carefully place the GPU in the slot until it “clicks” in place and feels secure. Next, take the PCI-E power cables connected to your power supply and connect them to the GPU. Depending on the GPU, the number of PCI-E connections can vary from as little as 8 to 24-pins. Take a look at the video below for assistance installing the graphics card.

Step 6: Installing the OS

In order to use your new PC, you will need an operating system. We went with Windows 10 as it is the industry standard.  To install it, you will need to create a Windows installation USB. Here is how you can create one. Grab an empty 16 GB USB thumb drive and head to a computer with internet access.  Next, open your preferred browser and follow this link: https://www.microsoft.com/en-us/software-download/windows10 , to find the Windows 10 installation media tool. Simply click “Download tool now”, wait for it to download fully, and then start the program. It will be labeled MediaCreationTool or something similar. Once started, you need to click “Accept” for the applicable notices and license terms, and then you will see the option to “Create installation media”. Click on it, hit “Next” and then select the proper Windows version for installation, based on your preferred language and system compatibility. Click “Next” again and select your USB flash drive as the media to use. Click “Next” one more time, then you should see the progress as it installs, and you will just need to click “Finish” when prompted. From there your USB drive is ready to go.  To use it, plug it in to your new PC and power on the computer. Next you will need to enter your PC’s boot-device selection menu in your motherboard’s BIOS, typically by pressing F2, Esc, F10 or F12 when your system is booting up. Once at the menu, you can select the option that boots the PC from the USB flash drive. That will start the Windows Setup and just follow the prompts you receive to install Windows. Once you do that you will be up and running in no time!

Conclusion

Congratulations, you’ve completed your PC build! Don’t be alarmed if the PC doesn’t boot up the first time you try turning it on – it happens all of the time during new builds and there are plenty of PC diagnostic resources online. While it may seem daunting at first, building a PC is a fairly simple process and is incredibly rewarding when done correctly. The customization provided by PC gaming is unparalleled and current trends seems to indicate that the PC gaming community is only going to continue to grow.

Video Citations:

DudeBrd. (2016, August 4). How to Install a Power Supply in Computer [Video file]. Retrieved from https://www.youtube.com/watch?v=VOsrsHC4CMk

Digital Trends. (2015, May 20). How to Install a SATA Hard Drive [Video file]. Retrieved from https://www.youtube.com/watch?v=NjfRYfN4jfM

Recent Posts

From the PS2 Couch Co-Op Era to the PC + Discord Era

| Gaming | No Comments
My first console was Sony's PlayStation 2. My favorite game was without a doubt SSX, Snowboard Supercross, first released October 26, 2000. You could bomb down insane mountain courses, launch…

Which GPU to Buy for AI? How I Learned to Love/Hate the CUDA Monopoly

| AI, Tech Tips | No Comments
Nightmares! I've regularly experienced nightmares that are far from normal or healthy, all revolving around AI and GPU benchmarking. However, these nightmares don't involve benchmarking the speed of an AI…

AMD RX 7800 XT vs AMD RX 6800 XT & NVIDIA RTX 4070 Comparison

| Gaming | No Comments
The highly anticipated 7800 XT has finally been released and we're eager to share its specs with you! In order to give you a better understanding of its performance, we'll…

Details about the Specs, Price, and Release Date for the New NVIDIA RTX 30XX Series Graphics Cards

By Gaming No Comments

Possible Specs: Expect a 7nm Ampere architecture with a GPU clocking up to 2.2GHz, boasting 21 TeraFlops of raw performance, 18Gbps making it 40% faster than 2080 Ti, possibly 20GB vram, PCIE 4.0 support.

Release date: September 2020

Price: Around the same as current line up


Currently most graphics cards distributors are emptying their stock of RTX 20XX series cards, it seems like they are finally preparing for the RTX 30XX series Ampere launch. There are rumors of August mass production and a September release for the newest best GPU on the market a RTX 3080 Ti and possibly even a RTX 3090.

The speculated specifications expect these new GPU’s to be clocking up to 2.2GHz, boasting 21 TeraFlops of raw performance and 18Gbps making it 40% faster than 2080 Ti. All to go with possibly 20GB VRAM and PCIE 4.0 support. These graphics cards are expected to boost performance, and increase power efficiency significantly. Plus new DLSS, could mean you can get to buttery smooth 4K with a midrange card – 3060 anyone?

A recent tweet from KittyCorgi mentions two models: A GA103 with 3,840 cores, 10/20GB of graphics RAM and a 320-bit memory bus. And a GA104 model with 3072 cores, 8/16GB of graphics RAM and a 256-bit memory bus. This is just speculation but we do have more information on the architecture. Similar to how Volta architecture preceded Turing with the RTX 20XX series, we expect the Ampere processor for data centers and AI NVIDIA makes right now to be a precursor for the same with the RTX 30xx series processor.

We originally expected an official release date to be announced at either Computex(September) or Gamescom (August), but by now Computex has been officially cancelled. So now expect the RTX 30XX series reveal either at Gamescon, which moved entirely online, or NVIDIA may even do there own private launch event in August. Either way with stock of RTX 20XX series running dry, and rumors of Ampere production ramping up in August, we expect new RTX graphics cards to be available in September.

We expect them to be priced roughly the same as the current line up, with 3070’s around $500, 3080’s around $700 and 3080Ti’s/3090’s at around $1200. Previously there was a jump from the GTX 10XX to the 20XX series because of a lack of competition, the Turing GPU’s ran unopposed until Radeon VII arrived the February after its release. But with Big Navi expected soon competition forces NVIDIA to keep prices roughly the same for this new line up. Also it is speculated they will use Samsung 7nm EUV production to reduces cost to manufacture the graphics card. Typically Taiwan Semiconductor Manufacturing Company (who you may know as the also produce chips for both Apple and AMD) manufactured NVIDIA’s cards, but they are apparently not as competitive price-wise right now.

NBA’s 2K Players Tournament Full Results

By Gaming No Comments
NBA 2K Players Tournament Full Bracket:

Above are all the player matchups from the tournament, you can see the players seeding, choice of team, and the games final scores.


This NBA 2k tournament is an exciting new eSports tournament put on by the NBA, featuring NBA stars playing 2K competitively against each other. The rules are as follows, it is a single elimination tournament for rounds one and two. The players were seeded by their 2K player rating, with Durant at No. 1 and Derrick Jones Jr at No. 16. Players select eight teams at the beginning of the tournament and cannot use the same team twice. The Semifinals and Finals are decided by playing best-of-three. Finally the overall winner gets to donate $100,000 of the NBA’s cash to the charity of their choice for coronavirus relief.

Finals: No. 5 Devin Booker vs No. 10 Deandre Ayton

Game 1: No. 5 Devin Booker (HOU Rockets) vs No. 10 Deandre Ayton (LA Lakers)

Score at the end of 1st Quarter: 14-14 Tied

Score at halftime: 29-33 Rockets Up

End of 3rd Quarter: 47-52 Rockets Up

Final score: 72-62 Booker wins at Rockets

This first one was a very competitive game, but Booker came out on top!


Game 2: No. 5 Devin Booker (DEN Nuggets) vs No. 10 Deandre Ayton (MIL Bucks)

Score at the end of 1st Quarter: 19-14 Nuggets Up

Score at halftime: 41-35 Nuggets Up

End of 3rd Quarter: 55-45 Nuggets Up

Final score: 74-62 Booker wins as Nuggets


Number one takeaway from these games has been that Booker is the by far the better s***talker and player. He has Deandre Ayton’s number by halftime and is just entirely demolishing him by the beginning of the fourth quarter. It is so bad that even though Ayton is clearly concentrating hard he seems out of his league. Ayton says “I can’t even get mad cause I don’t even know this game” and Booker is not having it.  He just asks “What are you saying its over with already? You want me to cut it off? Want me to cut it off?” to which Ayton meekly responds “No”. At this point its 61-47 Nuggets with 4:17 left to play and the game is already over. Booker continues to talk trash throughout as expected after all he went undefeated throughout the entire tournament.


Overall the tournament was a good fun, a great way to provide entertainment for fans of the NBA and donate to a good cause all at once. Booker chose to split his winnings between #FirstRespondersFirst and Arizona Food Bank Network. Who do you think will win next year? Let us know if the comment section below!

Microsoft’s Xbox Series X vs PC

By Gaming No Comments
Introduction

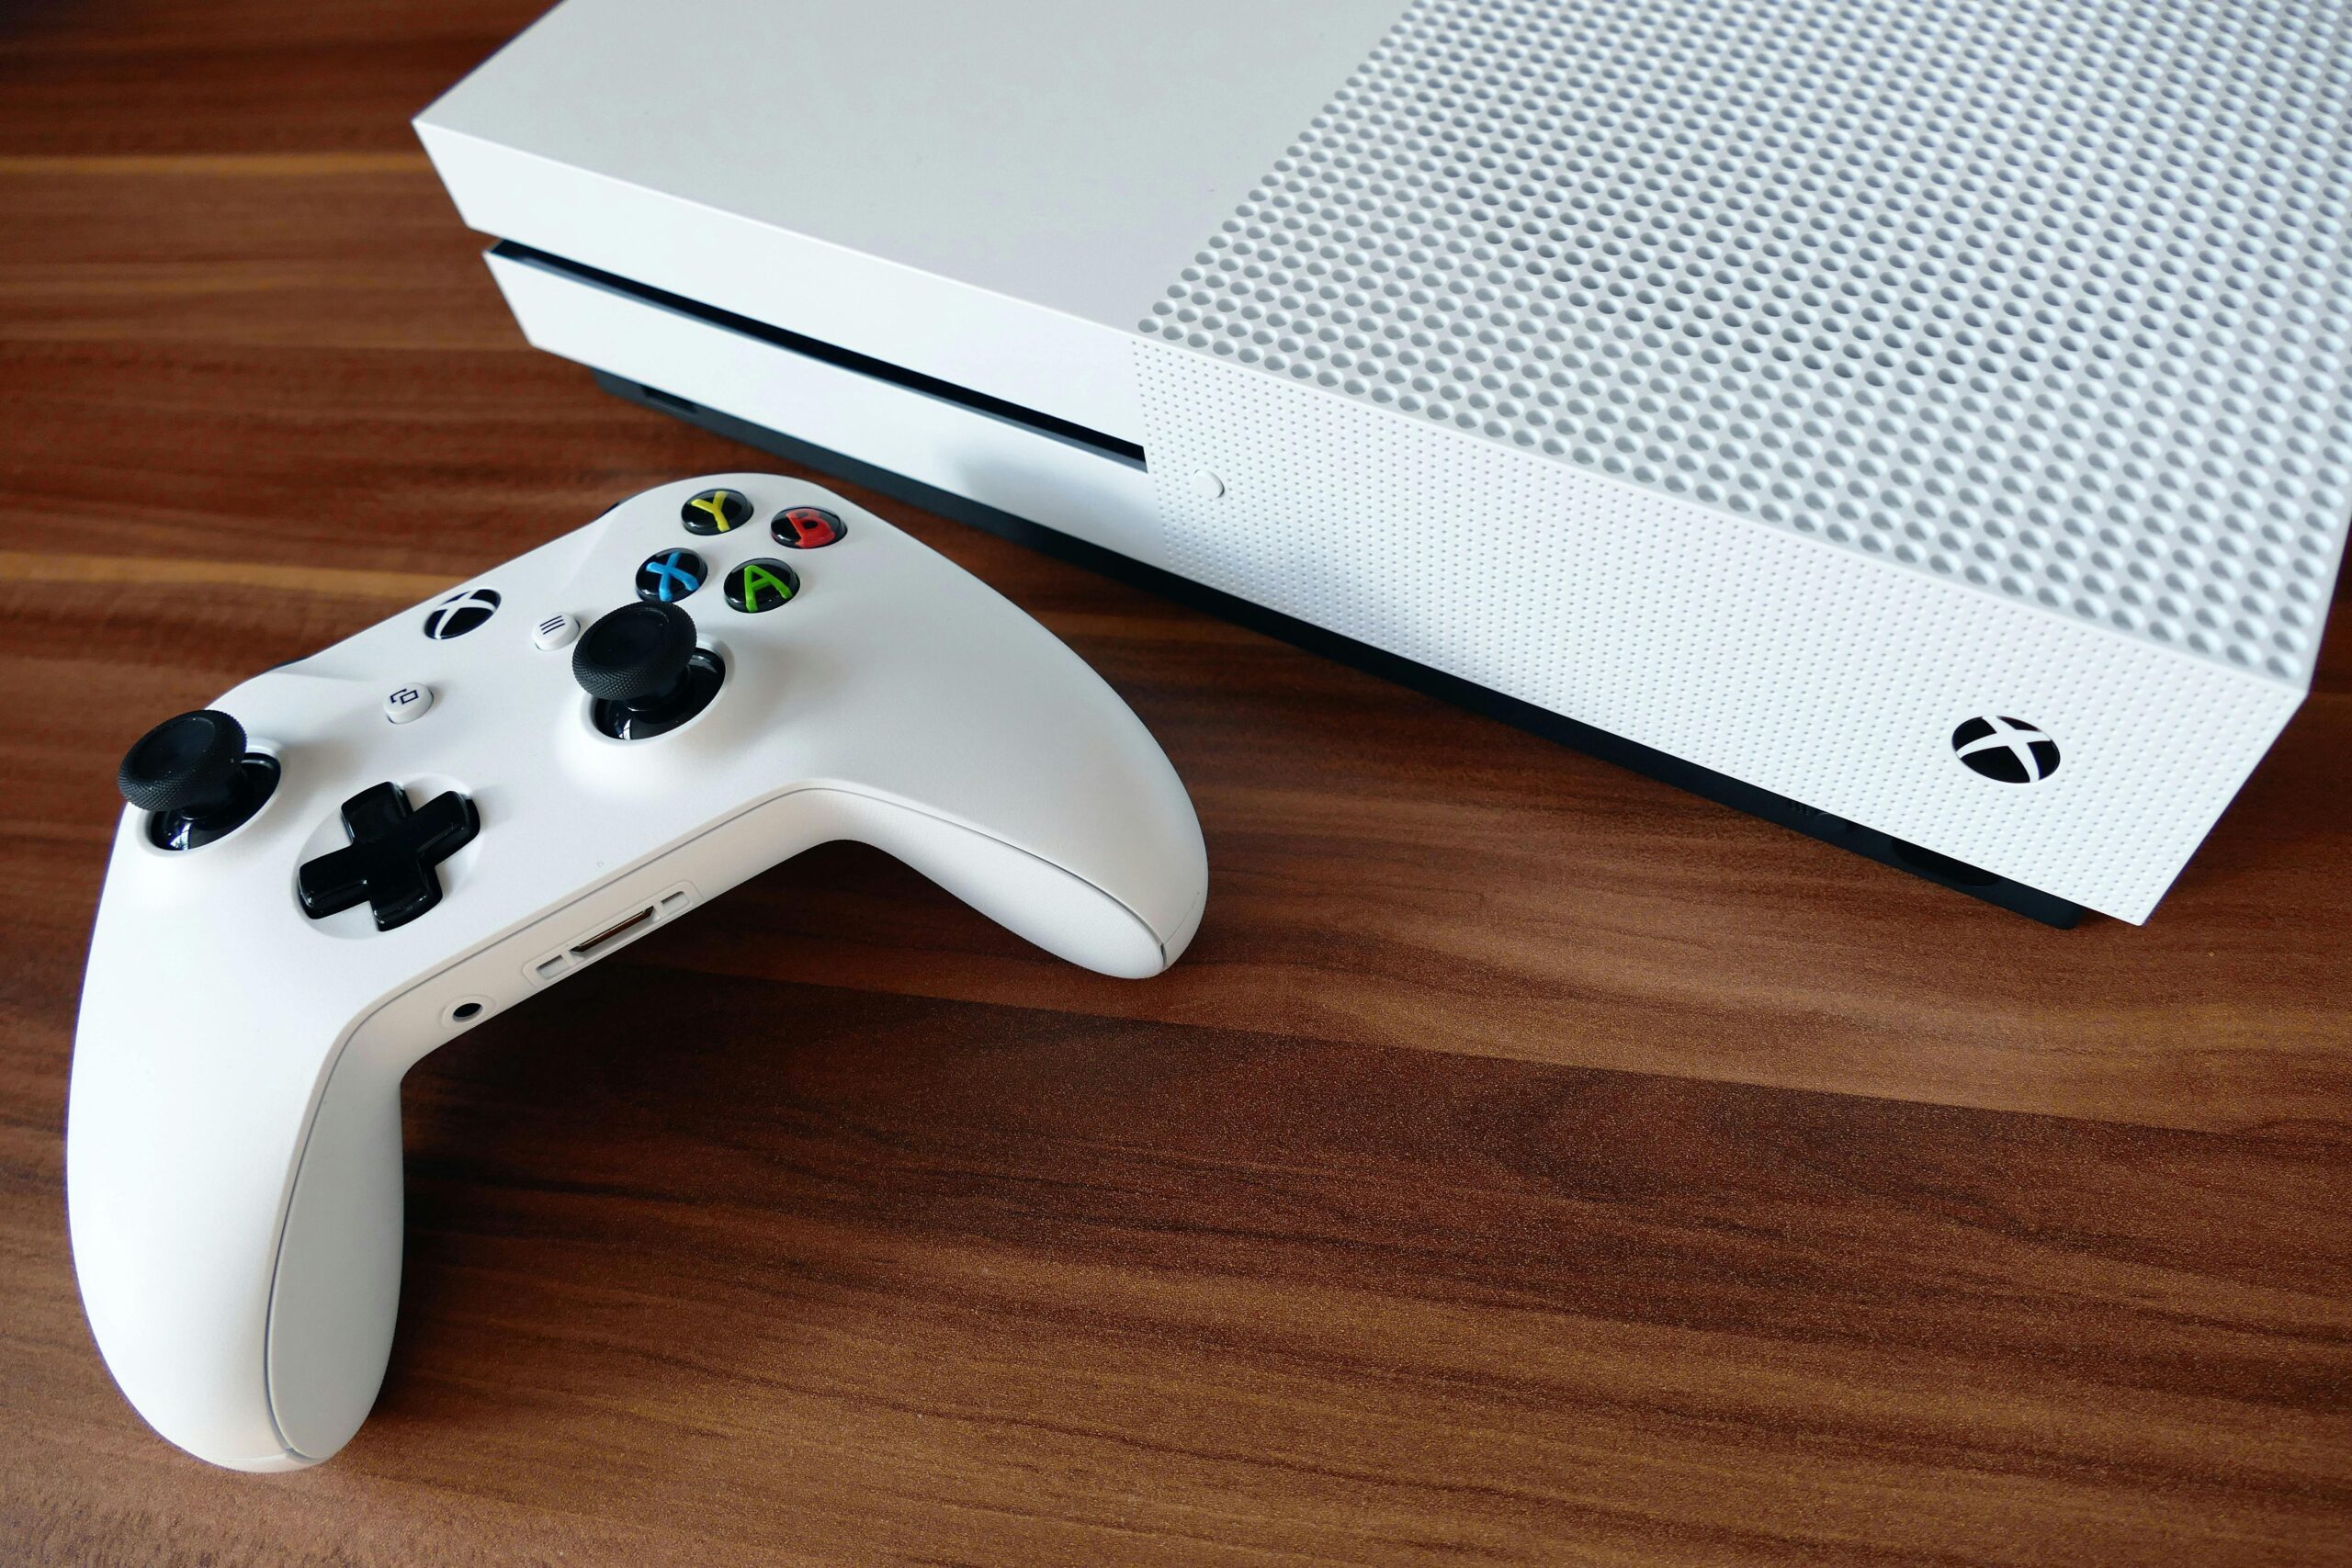
With Microsoft announcing its next-gen follow-up the popular Xbox One series consoles, the Xbox Series X, gamers around the world have begun to speculate about what kind of performance the console will be able to achieve and what the hardware is that will achieve it. Recently, Microsoft announced a preliminary list of specifications for the new console with more details planned to be revealed originally at this year’s E3 gaming convention. Now with E3’s cancellation they may decide to broadcast them independently elsewhere, regardless we will let you know when they release more information.

In this article, we will discuss the level of performance you should expect to get out of the Xbox Series X based on the released specifications and determine how it will stack up against the most powerful PC Gaming components currently available.

Microsoft revealed that the new Xbox Series X will include a new Navi GPU based on AMD’s RDNA-2 architecture. Some of you may recognize the RDNA architecture as it was introduced with the first wave of new Navi GPUs that included popular graphics cards like the AMD Radeon RX 5700 XT 50th Anniversary (100-438336) and the SAPPHIRE RX 5700 XT NITRO+ (11293-03-40G). Those cards introduced many firsts to the GPU world such as PCI Express 4.0 compatibility, and they also were the first line of AMD GPUs to utilize Radeon’s new RDNA architecture. The architecture was engineered to greatly enhance features like Radeon Image Sharpening, FidelityFX, and VR technologies. While seen as a huge step forward, RDNA lacked the real-time ray tracing capabilities of NVIDIA’s RTX series graphic cards. RDNA-2, the follow-up to the first RDNA architecture, is what the new Xbox Series X will run on. Described by AMD as a “refresh” of the RDNA-1 architecture, RDNA-2 boasts major improvements over its predecessor. According to AMD, RDNA-2 will provide a “50% performance-per-watt improvement over RDNA 1 ” meaning faster clock speeds and instructions per clock. Additionally, the new architecture will include real-time hardware accelerated ray tracing RDNA-1 lacked, and will also provide variable rate shading. It has been speculated that RDNA-2 will serve as the architecture for AMD’s next line of GPUs of which there is a GPU rumored to surpass the performance of the RTX 2080 Ti by 30%. See more here!

Hardware Specifications

The initial specifications released by Microsoft indicate that the new Xbox Series X will pack a serious performance punch. Listed below are the current set of specifications that have been confirmed by Microsoft:

  • Processor – AMD CPU based on Zen-2 (8x @ 3.6 GHz)
  • Graphics – Custom AMD Navi-based GPU (12 Teraflops)
  • Memory – 16GB GDDR6 RAM
  • Storage – NVMe SSD
  • Video Output – 8k, 4K
  • Ports – 3x USB-A, HDMI 2.1

While there is little in the way of specifics at the moment, we do know that the Xbox Series X will include a custom 8-core AMD CPU based on the Zen-2 and RDNA-2 architecture offer 12 teraflops of GPU performance. For those who are unaware, teraflops are a unit of computing speed used for GPUs. To put this into perspective, the NVIDIA RTX 2080 SUPER GPU has approximately 11 teraflops while the NVIDIA RTX 2080 Ti has 13.5 teraflops. The new Xbox falls right in between those two cards and runs just behind the 2080 Ti. The new console also boasts 16GB of GDDR6 of RAM and Microsoft claims that the card will be capable of outputting 8k, 4k, and “support for up to 120 fps”. While vague, it’s certain that the new Xbox will be capable of outputting impressive video quality.

Closing Thoughts

There are still many questions about Microsoft’s new console:

Q: When is the console going to be released?

Microsoft still has not given an exact release date of when the new console will be released but some speculated that an announcement was coming at this year’s E3 prior to its cancellation. Now we will have to wait and see instead!

Q: How hefty will the price tag be?

There is no information currently about what the new system will cost you if you want to get your hands on it. However, even if the console were to retail for $1,000 (approximately double that of the Xbox One) it would still be substantially cheaper than a PC build of the highest specifications – albeit less powerful.

Despite these questions, one thing for certain is that the system is shaping up to be a game changer in the home entertainment console industry.

From the PS2 Couch Co-Op Era to the PC + Discord Era

| Gaming | No Comments
My first console was Sony's PlayStation 2. My favorite game was without a doubt SSX, Snowboard Supercross, first released October 26, 2000. You could bomb down insane mountain courses, launch…

Which GPU to Buy for AI? How I Learned to Love/Hate the CUDA Monopoly

| AI, Tech Tips | No Comments
Nightmares! I've regularly experienced nightmares that are far from normal or healthy, all revolving around AI and GPU benchmarking. However, these nightmares don't involve benchmarking the speed of an AI…

AMD RX 7800 XT vs AMD RX 6800 XT & NVIDIA RTX 4070 Comparison

| Gaming | No Comments
The highly anticipated 7800 XT has finally been released and we're eager to share its specs with you! In order to give you a better understanding of its performance, we'll…

The RTX 40 Series Master Guide

| Gaming | No Comments
The RTX 40 series has now been out for 8 months - oh how time flies! Starting with the first released card, the RTX 4090, we've now got a variety…

The Ultimate Water Cooled RTX 2080 SUPER Comparison

By Gaming, Graphics Card Reviews No Comments
Comparison of the Best RTX 2080 SUPER Graphics Cards

Here is a comparison of the best RTX 2080 SUPER cards available on the market. We know you have been dying to know which models of the RTX 2080 SUPER perform and look the best and we are here to bring you that data. We are comparing top end models from three major aftermarket manufacturers you know well EVGA, GIGABYTE, and MSI. Now let’s get right into it!

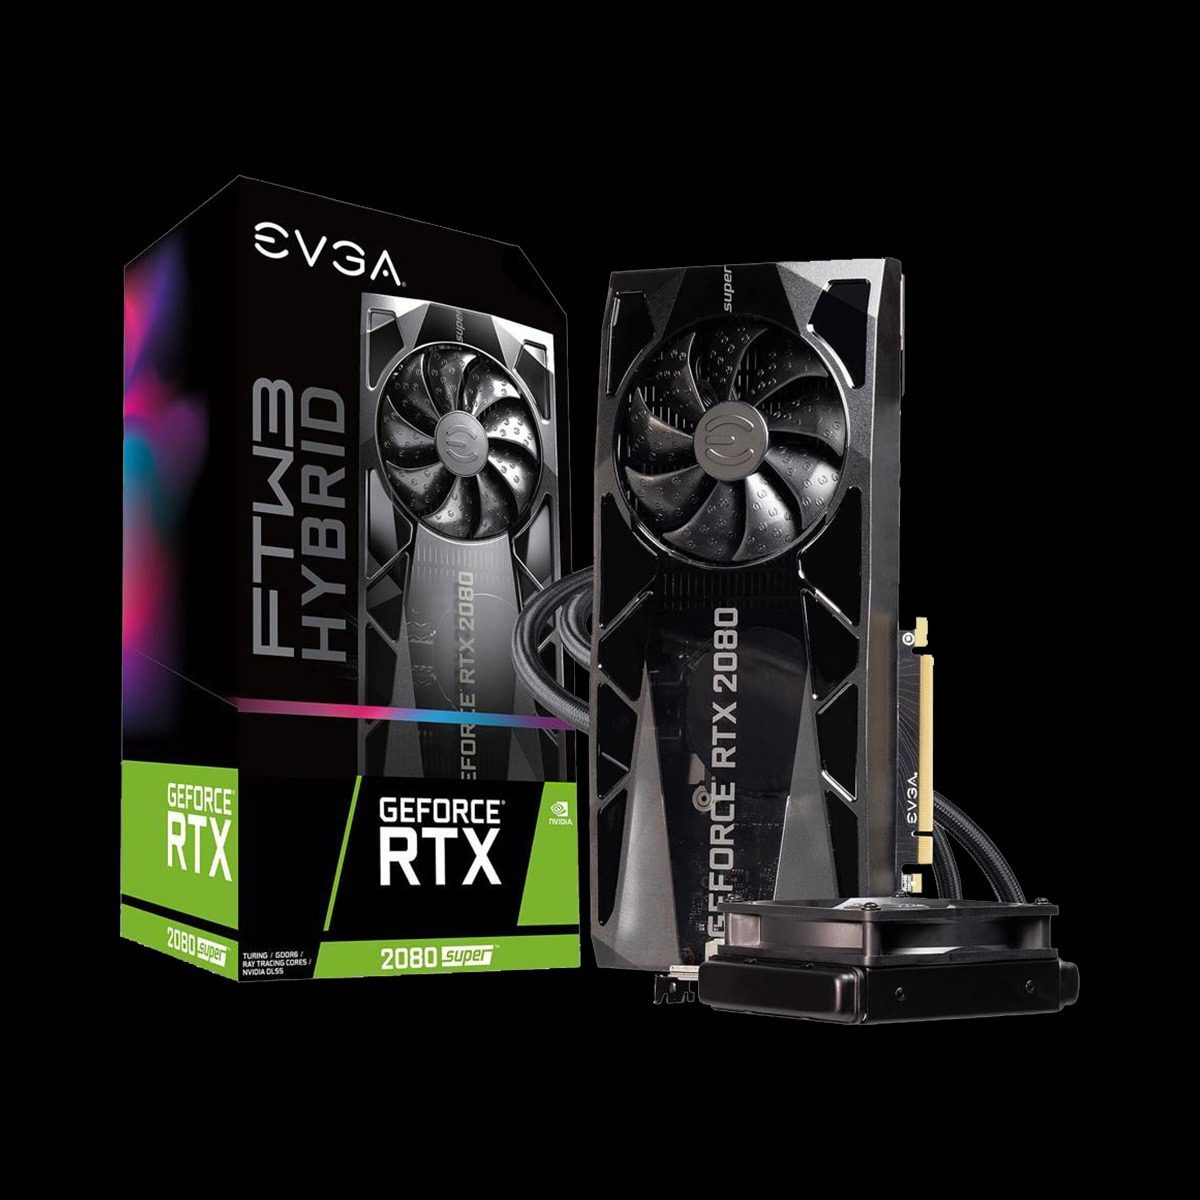
EVGA RTX 2080 SUPER FTW3 ULTRA HYBRID - P/N: 08G-P4-3288-KR

To the right you will see the EVGA RTX 2080 SUPER FTW3 ULTRA HYBRID. It is EVGA’s top of the line hybrid water cooled RTX 2080 SUPER GPU capable of gaming at the highest level. It looks sleek, with its silver and black design and it performs even better. The GeForce RTX graphics card utilizes the new Turing GPU bringing untold computational power to consumers. This card boasts six times faster performance that the previous generation, with two excellent new features: real-time ray tracing in games and powerful AI enhanced graphics. Not to mention the ice cold cooling provided by the EVGA Hybrid Cooling system. It provides an all in one, completely self-contained cooling loop that requires no filling, no custom tubing or maintenance. With its custom cooling and one of the best GPU’s available right now you can hardly do better that the EVGA RTX 2080 SUPER FTW3 Ultra Hybrid.

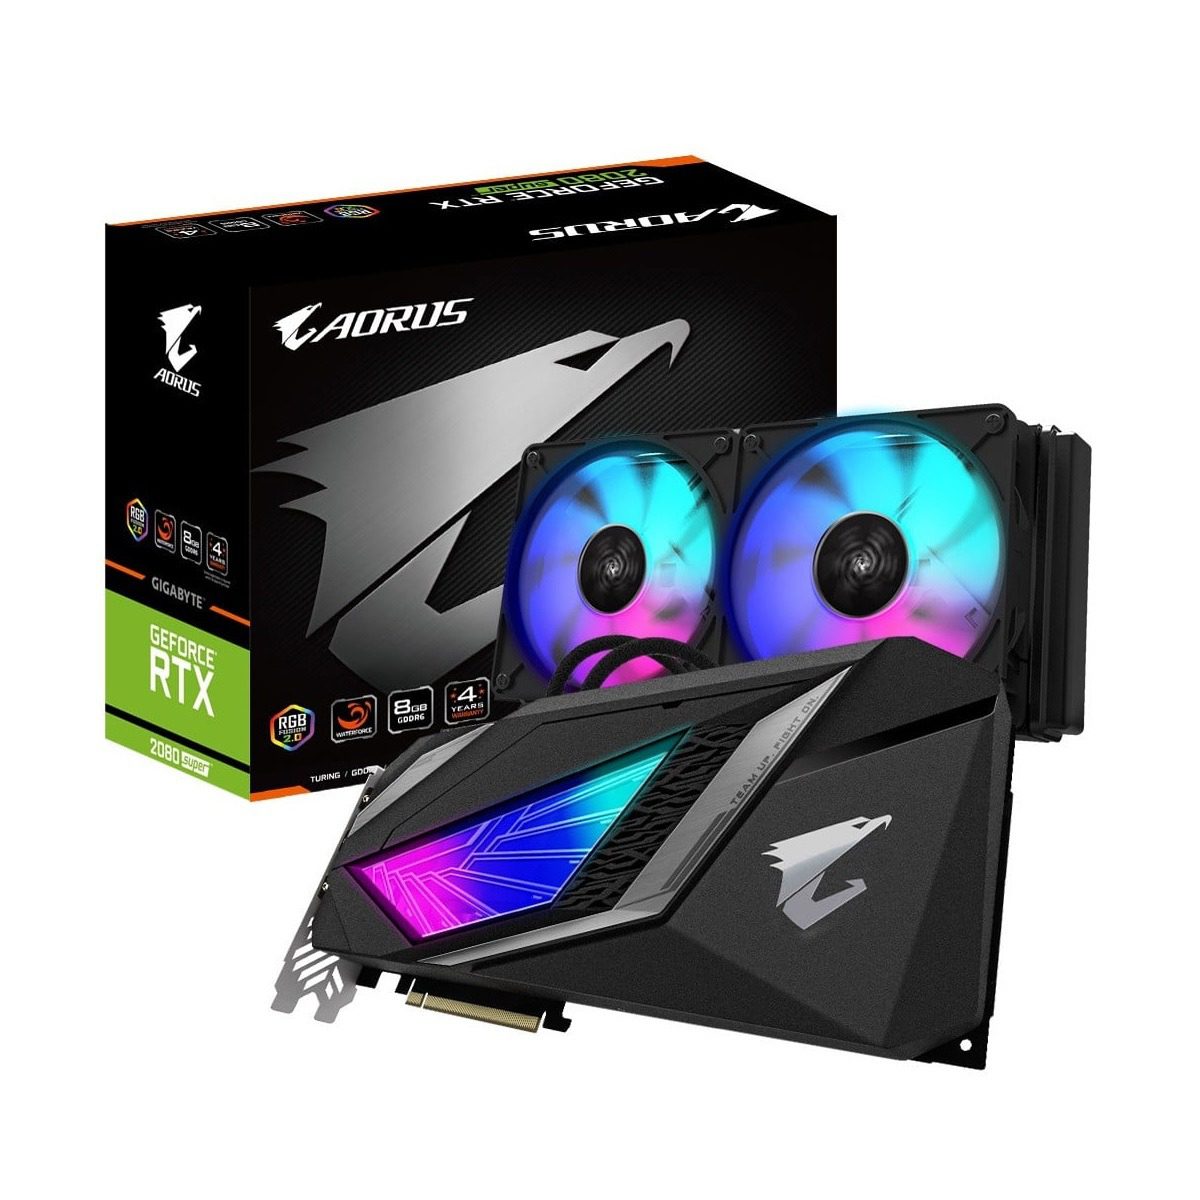
GIGABYTE RTX 2080 SUPER AORUS WATERFORCE - P/N: GV-N208SAORUS W-8GC

The GIGABYTE RTX 2080 SUPER AORUS WATERFORCE might just be better though. This card also uses the newest RTX 2080 SUPER GPU so it also has access to real-time ray tracing and AI enhanced graphics. However they use there own cooling loop system, AORUS provides an all-around cooling solution for all its important components, ensuring a stable overclock and longer card life span. Additionally this card boasts the highest clock speed of the three, coming in at 1860 MHz compared to the 1845MHz the other two have. One more cool unique fixture of this model is it has two more HDMI outputs taking it to seven total video outputs. Also this card takes inspiration for its design from the wings of the powerful falcon. It has a multi-layered design featuring striking contours, resembling a falcon’s wings. The coolest feature though has got to be the AORUS RGB FUSION 2.0 software that allows for some crazy cool lighting affects. The software allows for over 16.7 million customizable colors and effects to make your rig look amazing!

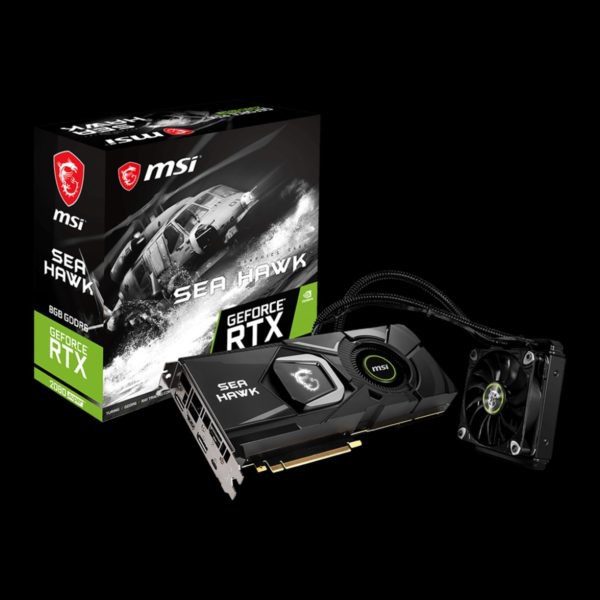
MSI RTX 2080 SUPER SEA HAWK X - P/N: RTX 2080 SUPER SEA HAWK X

We just received these cards for the first time and we are extremely excited to see how you guys like them. Once again powered by the RTX 2080 SUPER GPU this card also boasts AI enhanced graphics, and real-time ray tracing. This card also uses its own self contained cooling loop, with its own silent 120MM TORX Fan and an aluminum heat radiator that is easy to install, reduces airflow demand and looks excellent. The MSI RTX 2080 SUPER SEA HAWK X uses NVIDIA G-SYNC for the fastest, smoothest and best game play you can possibly get by eliminating any lag. Additionally they have their own excellent MSI custom software called Dragon Center. It is a consolidation of all their software into one unified suite, which will eventually allow you to control your MSI Desktop, Graphics card, and Motherboard all from one place if your build is all MSI.

Conclusion

These cards are the best you can get when talking about any RTX 2080 SUPER chip set with its own cooling loop. They all perform excellently and provide top of the line graphics which can only be beat by an RTX 2080 Ti. Picking the best card at this level is hard as you are really parsing hairs but our favorite card has got to be the GIGABYTE AORUS. Their AORUS software and RGB lighting takes this card to the next level, as it performs slightly better than the others and looks amazing while doing so. Please let us know which one you’d choose in the comment section below!

CEG’s Graphics Card RGB Gallery

By Gaming No Comments

When selecting a graphics card, gamers consider many things – price, performance, size, fit – and while it’s been meme’d to death, the finishing touch which RGB lighting provides is important to them. The RGB illumination that pulses from your graphics card serves as the bow that ties your PC build’s aesthetic together. In this article we’ll take a look at some of our favorite RGB displays from cards that we offer in our Graphics Card Leasing Program.

SAPPHIRE RX 5700 XT NITRO+ - PN: 11293-03-40G

In our previous article discussing the different AMD RX 5700 XT models we raved about the performance of the SAPPHIRE RX 5700 XT NITRO+ with it’s staggering 2035 MHz boost clock speed. The NITRO+ also boasts an impressive ARGB (alpha, red, green, blue) display, which you can customize with SAPPHIRE’s NITRO Glow software designed to change lighting displays for a more personalized gaming experience. The NITRO+ also comes equipped with ARGB fans (backlit RGB underneath the fans) that create a swirl effect when all three fans are engaged. The SAPPHIRE RX 5700 XT NITRO+ has excellent performance for its low price-point ($449.99) and the display pushes the card over the top.

GIGABYTE RTX 2080 Ti AORUS XTREME WATERFORCE - PN: GV-N208TAORUSX W-11GC

The first RTX 2080 Ti card from GIGABYTE that we have carried is the GIGABYTE RTX 2080 Ti AORUS XTREME WATERFORCE. The AORUS card boasts a radiator with two 120MM RGB fans that provide advanced cooling to the powerful GPU. Check out GIGABYTE’s RGB Fusion 2.0 software utilizing an integrated intuitive user interface that provides personalized lighting effect customization in tandem with the RGB lighting on the fans. In addition, RGB Fusion 2.0 features a “gaming mode” which syncs the lighting effects with a certain selection of games to create an even more immersive gaming experience. The end result is this great looking, better performing graphics card!

GIGABYTE RTX 2060 SUPER AORUS - PN: GV-N206SAORUS-8GC

GIGABYTE smashed it out of the park with the RTX series GPUs when it comes to RGB, and our next entry is also from GIGABYTE: the GIGABYTE RTX 2060 SUPER AORUS. The card also uses RGB Fusion 2.0 and features a three fan design that utilizes GIGABYTE’s alternate spinning technology. The fans feature a truly unique tri-color RGB design that allows for multi-color lighting on each fan simultaneously. This design in conjunction with the alternate spin technology combine to create a cool warp-like effect.

MSI RTX 2080 Ti LIGHTNING Z - PN: RTX 2080 Ti LIGHTNING Z

The last card on the list – and my personal favorite – is the MSI RTX 2080 Ti LIGHTNING Z. Using the MSI Dragon Center software, the LIGHTNING Z boasts a plethora of innovative lighting features. MSI created dazzling RGB lighting effects that have endless combinations, and also included popular preset effects like “color fusion”, “lightning strike”, and “magic”. Another awesome feature is the OLED panel that sits on the top of the card. The screen allows for customizable animations that work in tandem with the RGB lighting display. Animations include displays that show GPU temperature, memory usage, fan speed and more. The LIGHTNING Z features a backlit RGB design that rests behind the fans similar to the GIGABYTE AORUS card that we discussed earlier.

From the PS2 Couch Co-Op Era to the PC + Discord Era

| Gaming | No Comments
My first console was Sony's PlayStation 2. My favorite game was without a doubt SSX, Snowboard Supercross, first released October 26, 2000. You could bomb down insane mountain courses, launch…

Which GPU to Buy for AI? How I Learned to Love/Hate the CUDA Monopoly

| AI, Tech Tips | No Comments
Nightmares! I've regularly experienced nightmares that are far from normal or healthy, all revolving around AI and GPU benchmarking. However, these nightmares don't involve benchmarking the speed of an AI…

AMD RX 7800 XT vs AMD RX 6800 XT & NVIDIA RTX 4070 Comparison

| Gaming | No Comments
The highly anticipated 7800 XT has finally been released and we're eager to share its specs with you! In order to give you a better understanding of its performance, we'll…

The RTX 40 Series Master Guide

| Gaming | No Comments
The RTX 40 series has now been out for 8 months - oh how time flies! Starting with the first released card, the RTX 4090, we've now got a variety…

The Most Popular Streamers Around the Globe

By Gaming No Comments

Starting in the mid-2010’s, streaming has quickly become one of the largest and fastest growing new forms of entertainment. What exactly is video game streaming? It is when people broadcast themselves playing video games with commentary, in either pre-recorded or live streams online. On streaming platforms like Mixer, Twitch, YouTube Gaming etc. you can see how the top players play and have some insight into their thoughts. As streaming has become more popular the platforms for viewers have grown, Twitch itself has more traffic than Netflix and HBO’s online streaming service pulling in 185 million viewers, compared to HBO’s 130 million and Netflix’s 93 million in 2016. With all these viewers top streamers like Ninja, Tfue and Shroud are able to generate large amounts of influence and money. Now let’s take a look at what they do to generate their viewership and why these particular streamers are so popular.

Ninja

Richard Tyler Blevins aka Ninja is one of the streamers you may have heard of before, and for good reason. His YouTube account has over 22.2 million subscribers as of December 2019, and he has been streaming since 2011 compiling around two billion total views as of December 2019.

Ninja began his career as a professional Halo 3 player in 2009, he played for several organisations before eventually joining Luminosity Gaming in 2017. That year Ninja started to rise to fame with his win at the PUBG Gamescom Invitational Squads. After that win he began streaming Fornite regularly, and his timing could not have been better as Fortnite took off that year. So much so that by September 2017 he had over half a million followers and six months after that he had more than two million. By March 2018 he set the Twitch record for the largest concurrent audience on an individual stream (outside of tournament events) at 635,000 viewers, a record which did not last as he broke it again a month later with 667,000 viewers during his event Ninja Vegas 2018.  2018 continued to be a great year for Ninja as he was the first Esports player featured on the cover of ESPN Magazine, announced a partnership with Red Bull, and released his own record. Additionally he was in the NFL’s “The 100-Year Game”  ad which aired during Super Bowl LIII this year.

Along with all those accolades Blevins is making quite a career out of streaming. He was paid a reported $1 million to promote EA’s Apex Legends on his Twitch and Twitter accounts and he earns over $500,000 a month streaming Fortnite.

While he made a killing on Twitch, he decided to switch to Microsoft’s streaming platform Mixer as of August 1st, 2019. He did this as he felt Twitch was limiting his ability to grow his brand outside of video games. For instance he released a book in August called Get Good: My Ultimate Guide To Gaming published by Penguin Random House. He also was briefly a member of The Masked Singer  on Fox as his wife is a fan of the show.

After all of his streaming success he has also done some quality fundraising for charity. In February 2018, he raised over $110,000 for the American Foundation for Suicide Prevention. Then during the first annual Fortnite Battle Royale Esports event he gave away $50,000 in prize money, with $2,500 going to the Alzheimer’s Association. The charitable works roll on as in April 2018 he took part in the #Clips4Kids event, helping to raide over $340,000 for the charity. Additionally his team won the Fortnite Pro-Am event, winning the $1 million prize for the charity of their choice.

Tfue

Turner Tenney aka Tfue is another Twitch streamer and YouTuber who originally began streaming shooting games like Destiny and Call of Duty. Like many other streamers he switched to battle royale style titles such as H1Z1, PUBG and eventually landed on Fortnite as the game blew up in popularity. Lately his stream became incredibly popular, rivaling “Ninja”, as he boasts over 7.3 million followers on Twitch. He is a member of FaZe Clan since April 2018 and competed in Epic Games’ Summer Skirmish that same year.

While Ninja steered clear of any big controversies, Tfue’s career is littered with them. He was banned from Twitch in May 2018 for a month, after calling another player a “coon”. He did downplay the incident, claiming that the player was “playing like a snake, like a raccoon” and saying he “didn’t mean to say [the slur] in a racist way,”. He then went on to receive an in game ban from Fortnite because he selling accounts with rare skins, encouraging people to DM him on twitter to buy them. This is a direct violation of Fortnite’s End User License Agreement and resulted in the ban. Without seemingly learning anything Tfue was then banned again on August 23rd for unrevealed reasons. His brother claiming his chatroom turned toxic against another streamer, and his father saying he was banned for uttering a banned word on twitch. Others speculate he targeted a smaller streamer. According to fellow streamer Dextro he was banned for saying “I have AIDS” on stream.

Additionally during this time his YouTube account was criminally hacked around August 23rd 2018. His brother claiming “It’s been six days since his channel was deleted and it still has not been recovered, which completely and utterly blows my mind,”. Eventually his account was returned and on September 6th, 2018 his Twitch and YouTube accounts were reactivated. Tfue has not revealed why he was banned only stating “14 days, I got banned on Twitch for just some stupid, stupid stuff that I did’ ‘It wasn’t even bad, I honestly don’t even wanna get into it because it’s just so dumb.” Guess we’ll just have to wait and see if anymore is revealed about his suspension, for now we wish him the best of luck staying and hope he is able to remain streaming for years to come. Hopefully he can turn his image around and even contribute to charity using a similar model to “Ninja”.

Shroud

Michael Grzesiek aka “Shroud” is a Canadian professional streamer. He began his career as a Counter-Strike: Global Offensive (CS:GO) player before transitioning to streaming full time.

Prior to streaming he took first in all these events:

ESL ESEA Pro League Season 1 – North America 2015

iBUYPOWER Cup – 2015

ESL Pro League Season 4 – Finals 2016

Americas Minor Championship – Kraków 2017

All of those wins helped him build a viewer base and transition to streaming full time as people want to see the best of the best play. He is now famous for playing PlayerUnknown’s Battlegrounds, Apex Legends, Call of Duty: Black Ops 4 which he streamed on Twitch. He has streamed over 6,000 hours on Twitch with a reach of over 345 million total views. Recently in October 2019 he followed Ninja’s lead and left Twitch for Mixer, most likely for a large pile of cash as his YouTube channel has over 5.3 million subscribers.

As professional streamers become bigger stars it is interesting to see how video games are influencing culture worldwide. Stars like Ninja, Tfue, and Shroud are ambassadors for Esports now and will likely have a large impact on the future of gaming. They can use their influence to create charities and help the world if they manage to stay out of trouble. But most importantly they are here to entertain us and we hope they continue to do so for as long as they choose too.

What AMD RX 5700 XT GPU is Right For You?

By Gaming No Comments

We recently started carrying AMD’s new RX 5700 XT graphics cards and they’ve proven to be extremely popular among the Cutting Edge Gamer community. There are several different versions of the RX 5700 XT, and in this post we will explore the similarities and differences between them in an effort to help those of you readers who are trying to decide which of the RX 5700 XT cards is the right fit for you to lease or purchase.

XFX RX 5700 XT THICC II

The most recent addition to our graphics card inventory, the XFX RX 5700 XT THICC II, has earned its place in our GPU lineup. The THICC II boasts a sleek black finish and a dual fan configuration built upon XFX’s acclaimed Ghost Thermal 2.0 design. This design utilizes a 90% larger heat-sink which reduces noise by 35% (fans utilize idle-stop functionality, meaning fans won’t start spinning until the GPU is placed under a heavy load) while also keeping temperature yields low. AMD’s RX 5700 XT GPUs support the PCIe 4.0 interface, and the THICC II follows suit (note that PCIe 4.0 is currently only compatible with a Ryzen 3000 CPU and x570 motherboard). The THICC II utilizes the RDNA architecture that powers AMD’s 7nm GPUs delivering 1.25 performance per clock. The GPU also has 8GB of GDDR6 memory which allows for fast speeds and exceptional 1440p performance.

Performance-wise, the THICC II exceeds its NVIDIA counterpart (the RTX 2060 SUPER) in every way. In fact, the THICC II reaches frame rates that are close to even the RTX 2070 SUPER. The THICC II has a base clock of 1605 MHz and a boost clock of 1905 MHz. Currently, the XFX RX 5700 XT THICC II is available on our website for $50.99/month under our lease-to-own program, and also retails in most places for around $440.

The SAPPHIRE RX 5700 XT PULSE & the SAPPHIRE RX 5700 XT NITRO+

The SAPPHIRE RX 5700 XT PULSE and the SAPPHIRE RX 5700 XT NITRO+ serve as our first batch of RX 5700 XT GPUs made by SAPPHIRE. Both video cards provide great PC gaming performance at a low cost with each having distinct features that set them apart.

SAPPHIRE RX 5700 XT PULSE

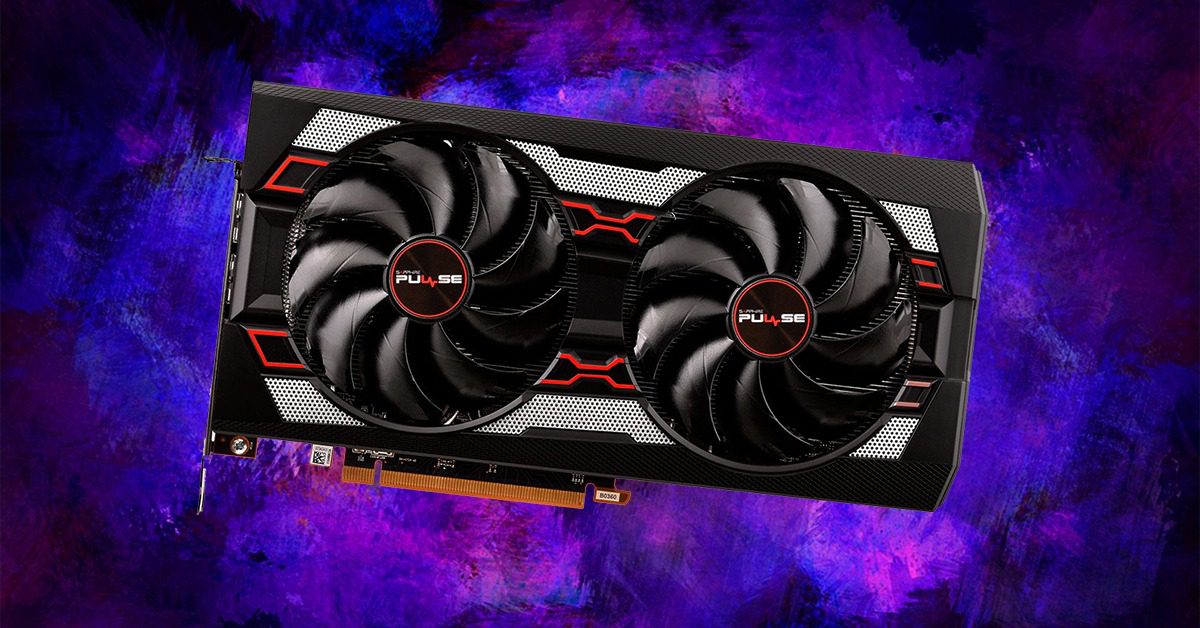
The SAPPHIRE RX 5700 XT PULSE comes in a black/red/white color scheme which has a very different look from past SAPPHIRE cards. Like the XFX RX 5700 XT THICC II, the PULSE utilizes a 2-fan design. SAPPHIRE’s Dual-X cooling technology keeps the GPU, memory, and VRM components cool under heavy loads while keeping noise levels low. The PULSE features the new PCIe 4.0 interface and has 8GB of GDDR6 memory. Both the base clock (1670 MHz) and boost clock (1925 MHz) are faster for the PULSE when compared to the THICC II. The PULSE is available for lease on our website for $50.99/month and retails for $420-$430.

SAPPHIRE RX 5700 XT NITRO+

The SAPPHIRE RX 5700 XT NITRO+, the first 3-fan RX 5700 XT graphics card that we’ve carried thus far, is quite different from its other 5700 XT peers. The NITRO+ boasts all of the same game-changing features that the aforementioned RX 5700 XT cards have: PCIe 4.0, 7nm manufacturing process, and AMD’s RDNA architecture, but that’s where the similarities end. The NITRO+ has a much higher base clock (1770 MHz) than the THICC II and the PULSE, and its boost clock can reach up to 2010 MHz! To put that into perspective, most of NVIDIA’s 2080 SUPER cards have boost clock speeds that top out around 1900 MHz. The NITRO+’s lightning clock speed is possible thanks to SAPPHIRE’s Trixx Boost software. By slightly lowering resolution, Trixx Boost bumps up SAPPHIRE’s already impressive overclock speeds to unprecedented levels never before seen from AMD cards. That takes us to the best part about the NITRO+, the price. Gamers can get their hands on a NITRO+ for ~$460 or lease one from us for $53.99/month! In my opinion, the SAPPHIRE RX 5700 XT NITRO+ is the best 5700 XT video card, and one of the best GPUs in general, that money can buy.

MSI RX 5700 XT MECH OC

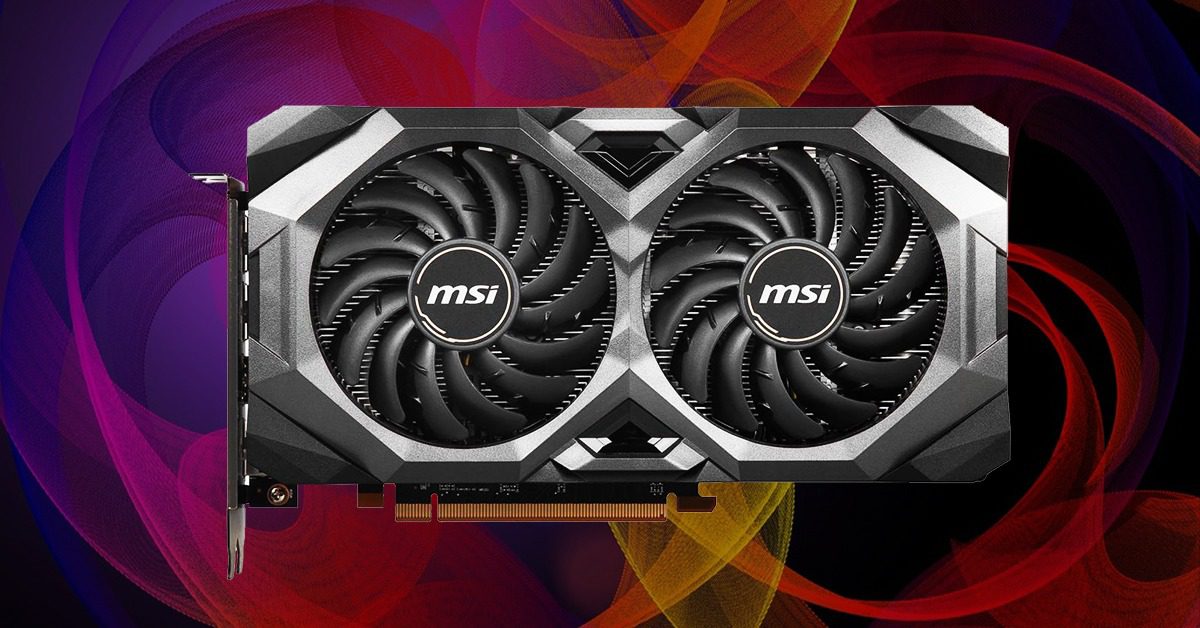
The first batch of MSI RX 5700 XT cards that we’ve made available are the MSI RX 5700 XT EVOKE OC & the MSI RX 5700 XT MECH OC. Both of the cards have a dual fan design with two distinct aesthetics. The MECH features the TORX Fan 3.0 design which has reduced GPU temperatures by 11%. The MECH has a base clock of 1670 MHz and a boost clock of 1925 MHz. This places the card on par with with the SAPPHIRE RX 5700 XT PULSE performance-wise. Like the other 5700 XT cards, the MECH is built upon AMD’s new RDNA architecture. The MECH retails for ~$420, and you can lease one from us for $50.99/month.

The MSI RX 5700 XT EVOKE OC is similar in performance to the MECH, but different in design. The card boasts a beautiful champagne gold trim with a carved grill to improve dissipation. ZeroFrozr technology keeps the fan noise down under low loads, and TORX fan 3.0 keeps the GPU temperatures down. The EVOKE has slightly higher clock speeds compared to the MECH with a base clock of 1690 MHZ and a boost clock of 1945 MHz. The EVOKE is slightly more expensive than the MECH, retailing for ~$430, and you can lease on from us for $51.99/month. Choosing between these cards is more about personal aesthetic preference, and both cards will provide smooth 1440p gaming performance.

MSI RX 5700 XT EVOKE OC
Conclusion

AMD really hit it out of the park with the RX 5700 XT cards, and gamers are praising them more than any other GPU in recent memory. Whether you decide to go with the THICC II, PULSE, NITRO+, MECH or EVOKE, the RX 5700 XT will certainly elevate your PC gaming experience. If you’re interested in getting your hands on one of these cards, check out or graphics cards leasing program!

NVIDIA’s New GPU Line: Ampere

By Gaming No Comments

NVIDIA released the GeForce RTX 2080 Ti all the way back in September 27, 2018 and since then little has been revealed about what is coming next. Until recently, more and more facts have been revealed lately and we here at Cutting Edge Gamer are happy to share what we have found out. These new chips, dubbed the Ampere line, should be faster (duh), loaded with more VRAM and cheaper. They will follow the current naming convention and be released as the RTX 30XX series, offering a GeForce RTX 3070, a RTX 3080 and a RTX 3080 Ti model as soon as Summer 2020. Now let’s get into how they are going to meet those lofty rumor mill expectations.

These new Ampere NVIDIA chips will offer a statistically huge performance improvement over the RTX 20XX cards as they feature a new more efficient version of ray tracing. The RTX 30xx servies are also rumored to have some big improvements in their rasterization capabilities, which should combine with the ray tracing advancements and enable you to render next generational graphics live in games.

Additionally they are reported to feature more VRAM in each card with the NVIDIA GeForce RTX 3070 and the NVIDIA GeForce RTX 3080 listed at 12GB while the NVIDIA GeForce RTX 3080 Ti will boast a beefy 16GB of VRAM. This should help these Ampere cards to push between a 100-200MHz improvement in clock speeds vs the predecessor, especially as they are more efficient due to the expected new 7nm architecture they desperately needed to move to.

This architecture should be manufactured by Samsung using the 7nm EUV process node, which allows the cards to run at under 1.0v but will limit overclocking. Additionally working with Samsung to produce these nodes should drive costs down, a big need after the adversity faced with the release of the last line of RTX 20 series cards.

Here’s to hoping they drop sooner rather than later. We promise to update you guys with FurMarks as soon as we can get our hands on some sweet new Ampere cards. We really cannot wait to see what this new generation is capable of!

How to Properly Clean a Graphics Card

By Gaming No Comments
Tools for Cleaning

These are the items you will need to properly clean and test a card:

  • Compressed Air Can
  • Pipe Cleaners
  • 99% Isopropyl Alcohol
  • Q-tips
  • Cleaning Rag
  • Phillips Head Screw Driver

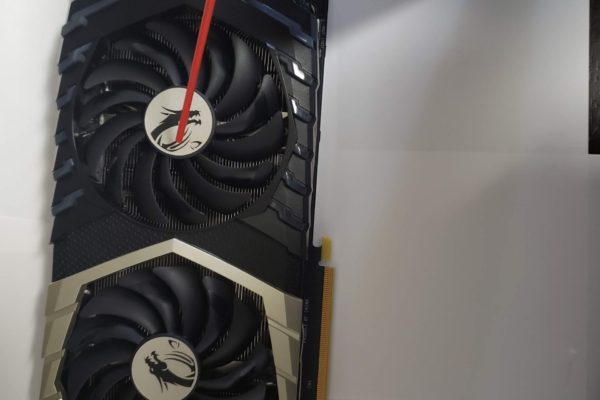
All of them are visible in the gallery to the right in case you are at all confused.

Compressed Air and Pipe Cleaners

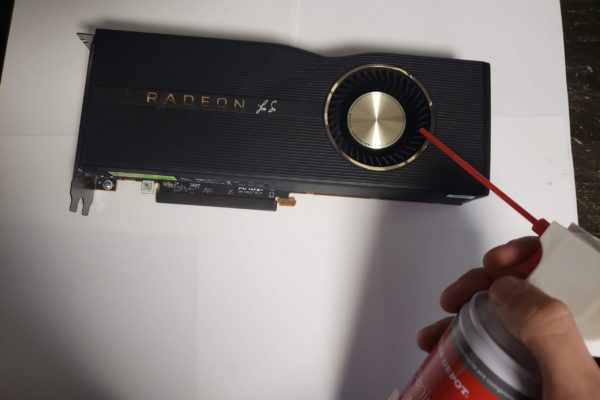
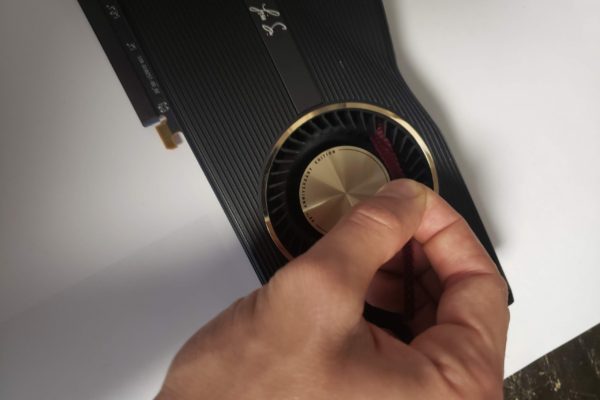
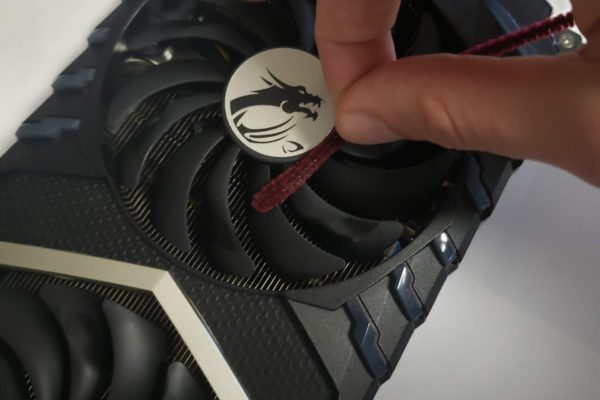
To the right you will see the technique you should use to clean the graphics cards with compressed air. We have images for both the blower and aftermarket style coolers as well. Use the canister first and spray the air in wherever you can see an opening, just be careful not to hold the can upside down or you will shoot out coolant which is not good for the card. Additionally the can itself will get extremely cold in your hand. Make sure you use the compressed air first to get all the dust off before going in for a deep cleaning with the pipe cleaners. You’ll want to bend them to make sure you can get all the dust from behind the fan blades and any other hard to reach spots. This should clean most cards.

For a Deeper Clean

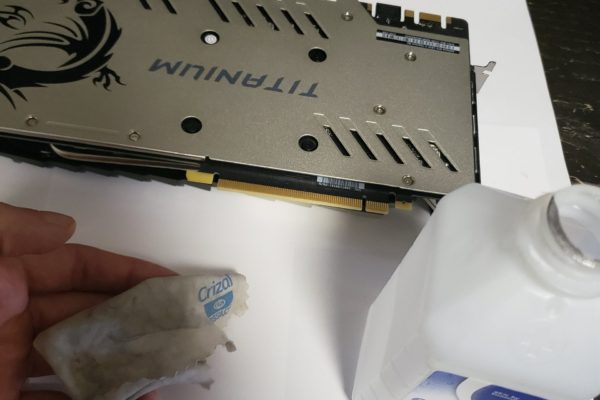
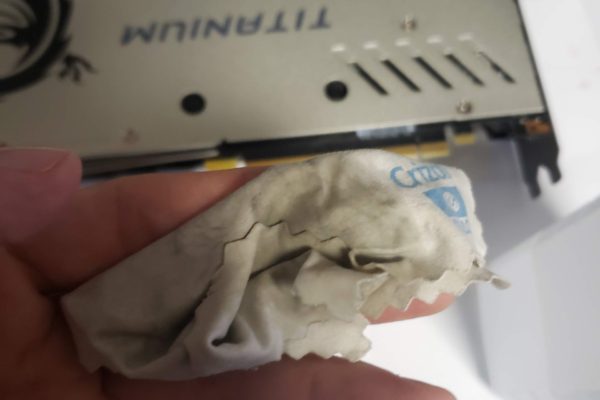
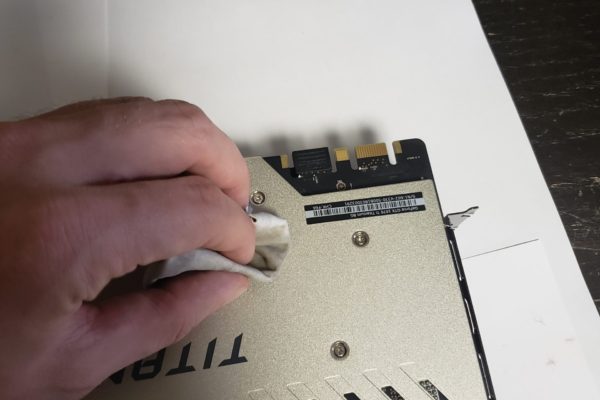
To the right you will see a method for getting any sort of grit or grime off your card. Use gloves if it gross, you should be able to get similar ones at HEB or CVS. You will want to use Isopropyl alcohol since any water will damage the card. Be careful with is and only use a dab on a dab, as pictured to the right. Then just wipe down the dirt or substance and it should come off quickly. You can use the Q-tips if there is any stain that is harder to reach with the cloth. That should cover all the steps to properly clean a card.

Benchmarking a Graphics Card

In order to insure your graphics card is working to the best of its ability you will want to know how to test your graphics card. First thing you will want to do is install a benchmarking program, we will use Furmark for this example.

Here is a link to download Furmark: https://geeks3d.com/furmark/

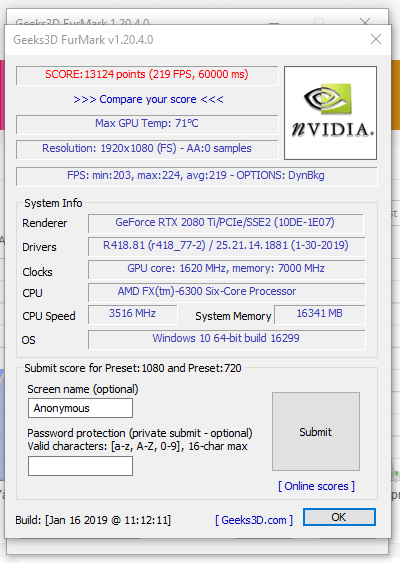
Once you install it, you can open the program from your start screen and run one of the tests by clicking the preset test button. In this example we used the preset 1980x1080P. You can see the results of our test for a RTX 2080 Ti in the image to the left. There you will see the temperature, FPS and other specifications for your system which you want to know. Check to make sure you’re card is performing up to specs by comparing the results you get to Furmarks you find online for the same card. We here at CEG hope these tips help you!

Compare Products
Compare ×
Let's Compare! Continue shopping